 |  |
|

The IdeaThe hexcam is a small camera that is tucked inside the roof of a standard hexagonal birdhouse for wrens, chickadees and nuthatches. After seeing other animal cameras that were accessible online, the idea of creating a camera for birds in the backyard followed soon after. The plan has always called for the camera being mounted in the roof so that the slide-on bracket system was not compromised and the birdhouse still retained all of its great features. | |
The Camera | |
|
After working with several ideas and testing a couple different cameras, dropcam (Figure 1) came out as the winner as it was the only camera that could provide everything that was essential for a birdhouse cam. Dropcam is a small surveillance camera which is pre-programmed and doesn't need coding unlike the raspberry pi with camera attachment. The dropcam allows Wi-Fi monitoring in HD and low light situations with a built in IR option. The live video stream is uploaded to a cloud server where it can be viewed on an embedded webpage. You can learn more about the camera by visiting the dropcam website. | 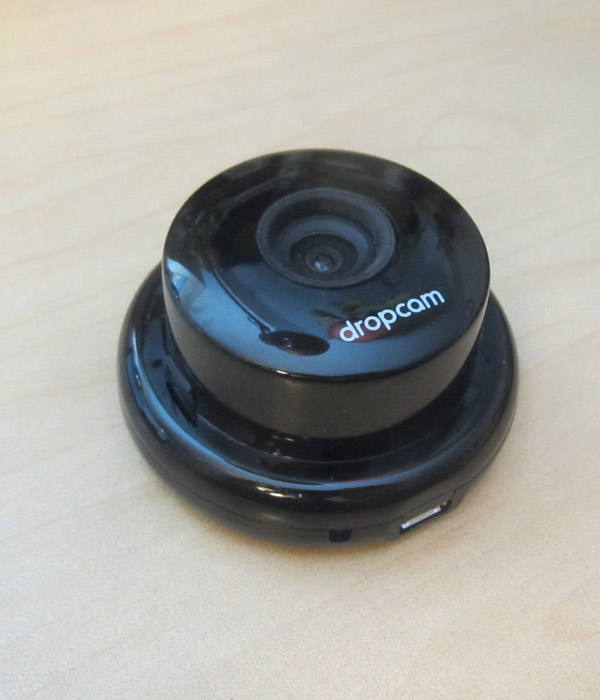 |
| Figure 1. Dropcam camera module. | |
Adding the Camera to a Roof | |
|
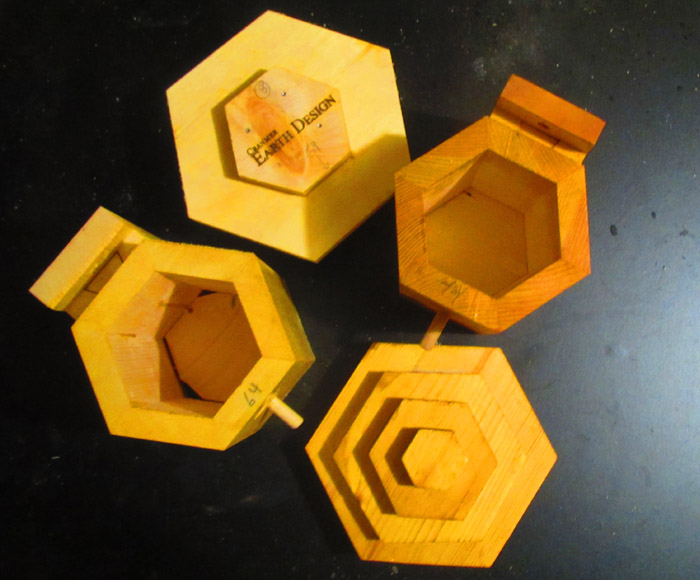
There are several birdhouses in our backyard and it is uncertain which birdhouses will be occupied in the upcoming season. The hexcam must be fitted into a roof that can replace the roof of whatever birdhouse the birds chose. The birdhouses in Figure 2 show the slight different in size between the birdhouses built back in 2010, and ones built in the last couple of years. |
| Figure 2. Two birdhouses that have slightly different sized bodies. |
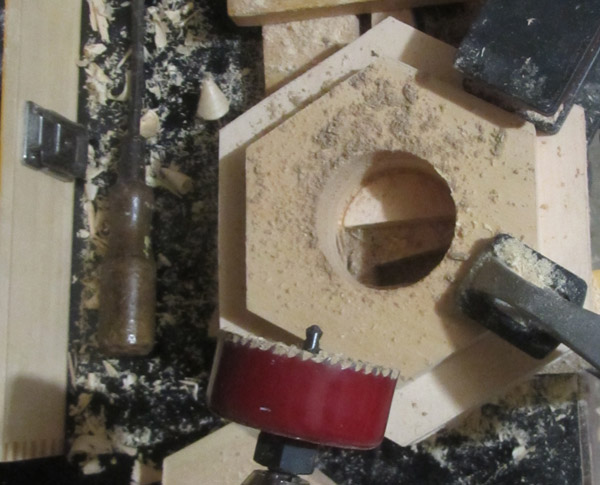
| A 2.5" hole was drilled into several layers of the roof (Figure 3) allowing the camera to easily fit.
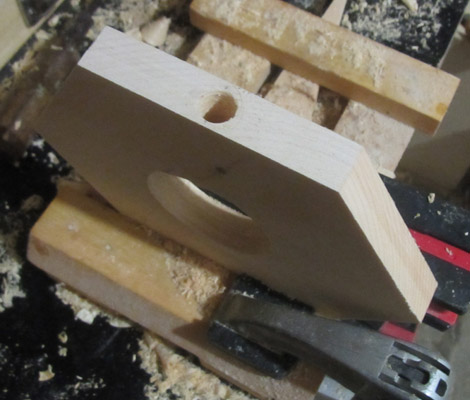
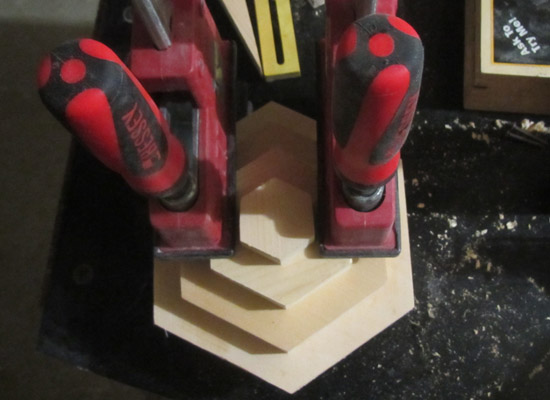
The power cord was tricky to incorporate into the roof because it does not bend easily. To prevent water from dripping down the cord and making its way to the camera, a hole was drilled horizontally from where the camera will sit inside the birdhouse roof. This happens to be through the largest hexagon as seen in Figure 4. Since the dropcam is supposed to be for interior use only, conditions inside the birdhouse need to be as dry as possible. Throughout the years of using the hexagonal birdhouse, the insides have always been dry whenever a nest was emptied out, which is great news! However, extra precautions need to be taken to ensure the camera is out of the weather. Figure 5 shows glueing the multiple layeres of the roof together. This particular hexagonal birdhouse roof will not have any nails holding it together. |
|
| Figure 3. Drilling the camera cavity. | |
| |
| Figure 4. Horizontal hole for cord. | |
 |
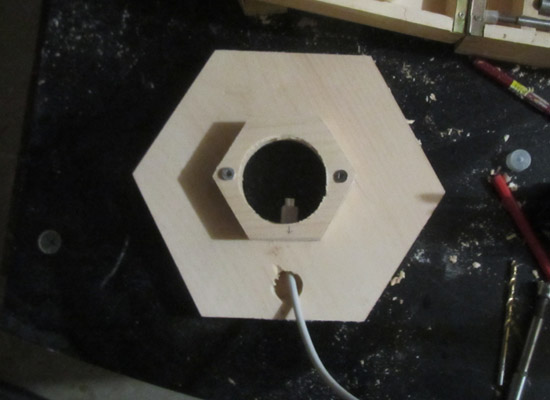 |
| Figure 5. Gluing roof layers together. | Figure 6. Additional hole and small hexagon. |
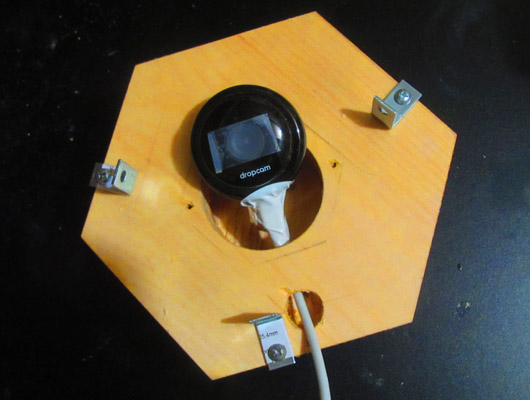
| The smaller hexagon which fits into the birdhouse body will be used to hold the camera above the birdhouse body (Figure 6 above). The screws are for easy access for installing and maintaining the camera as necessary. A 3/4" secondary hole was drilled to meet the previous hole drilled in Figure 4 to allow the cord to drop down behind the birdhouse. If the birdhouse roof is up against a post, tree or fence the cord will not fit comfortably through the horizontally drilled hole. | |
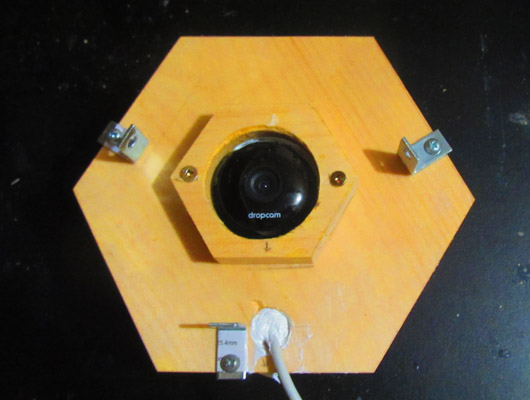
| Screws are drilled into the inner roof cavity (Figure 7) to help the back of the camera from getting too hot as well as allow for the depth of the camera to be adjusted so it fits tightly against the small hexagon. Wing bolts and 90 degree braces were added on three sides to allow the roof to be quickly attached to any size of birdhouse. The entire roof was coated with PolyWhey the day before giving a slightly different colour compared to the previous figures. | 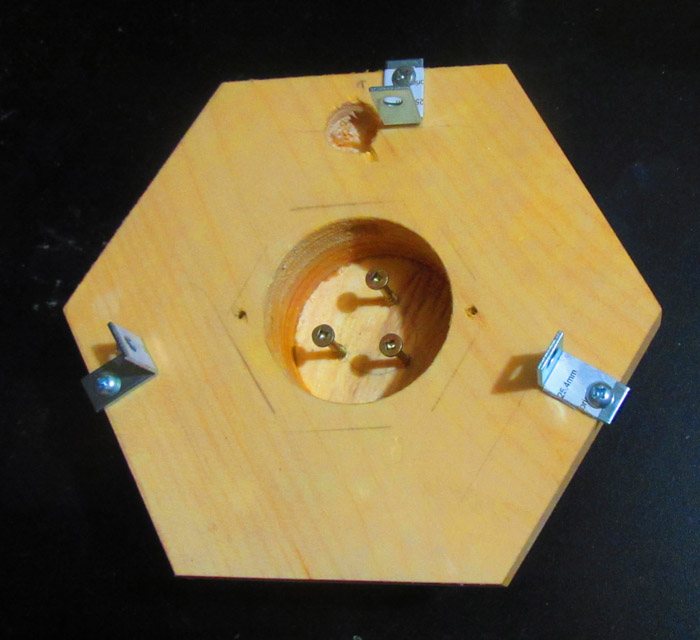
|
| Figure 7. Screws added for behind the camera as well as braces for wing bolts to fasten the roof to the birdhouse body. |
|
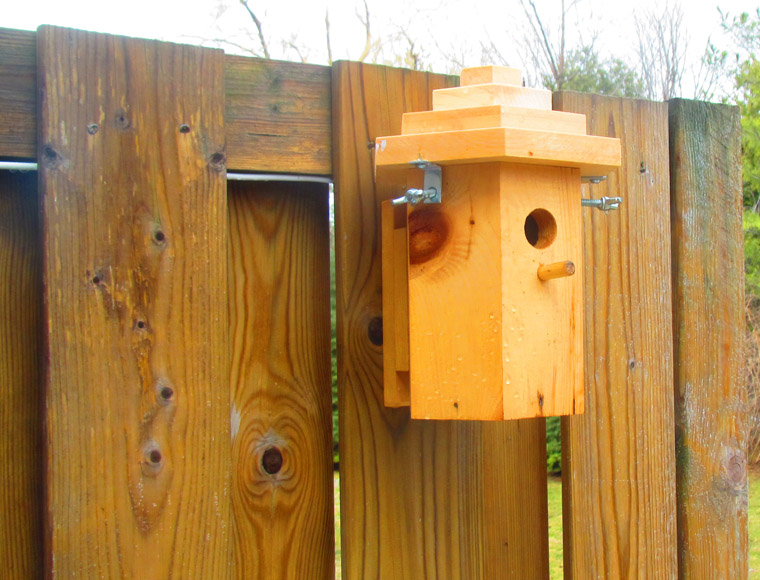
The camera adaptor was plugged into a 14 gauge extension cord with a locking cover. For added protection the connection is put into a plastic bag and taped well. Once birds are building a nest in an outdoor birdhouse, the hexcam roof is exchanged with the old birdhouse roof (Figure 10). The hexcam is now outside and ready to go! |
| Figure 10. The hexcam added to exterior birdhouse body. |

© Cranmer Earth Design ![]()